Today, as promised, I bring you the icing basket weave tutorial from my level 2 Wilton cake decorating course.
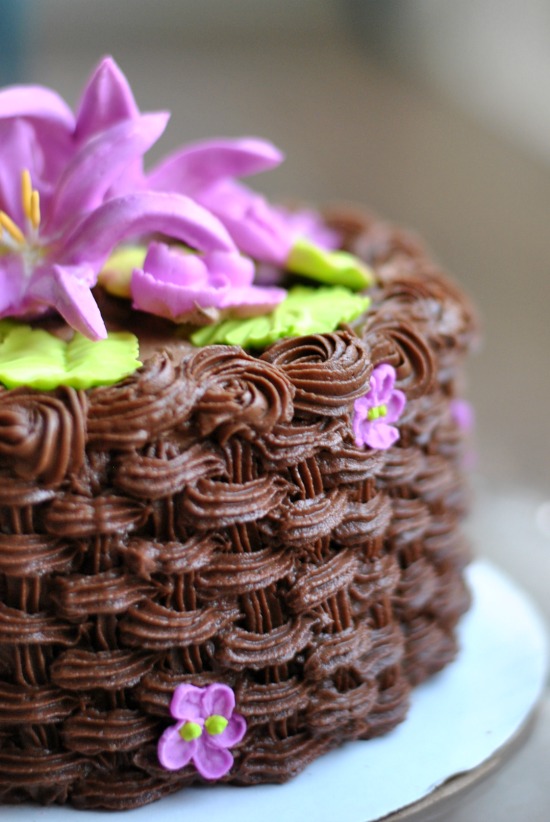
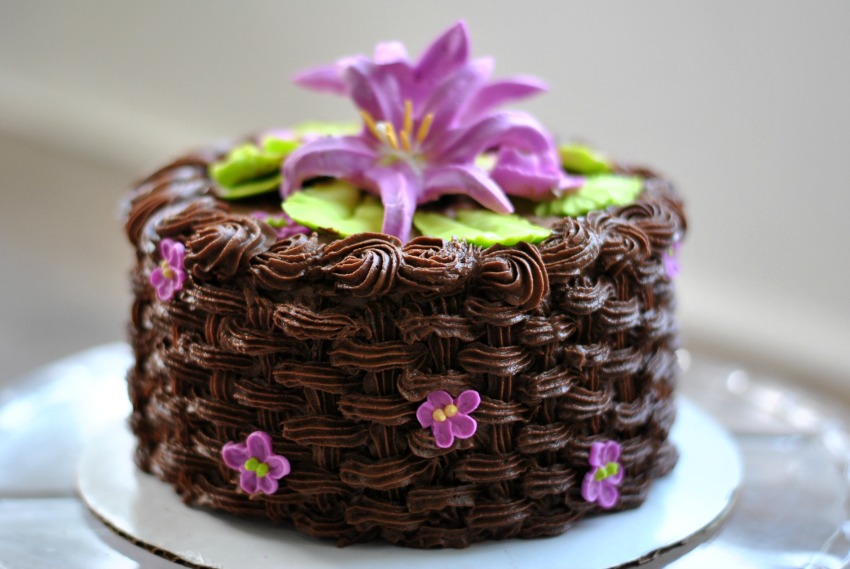
My first icing basket weave on a cake – surprisingly, it turned out alright
When I first learned that we were required to do a basket weave for our final cake in my cake decorating course, I was a bit, oh I don’t know: petrified, bummed out, unenthused, ready to run away…
Before this I thought the basket weave was super complex.
I mean, I still can’t braid my hair without first wanting to pull all of it out. And 2. I thought the look was a bit old school. Ok so I still think the look is a bit old school. Probably not something I’d put on a modern themed cake, but all the same the basket weave is so pretty, easy and super versatile. You could put almost anything as the centerpiece in your basket cake. We used flowers, because it was what we learned, but I can think of a million fun things (sugar cookies decorated like fruit – how much better is that than a real fruit basket??, picnic themed sugar cookies or fondant objects, gum paste puppy or puppies, store bought candies to represent any theme you’re going for, ect).
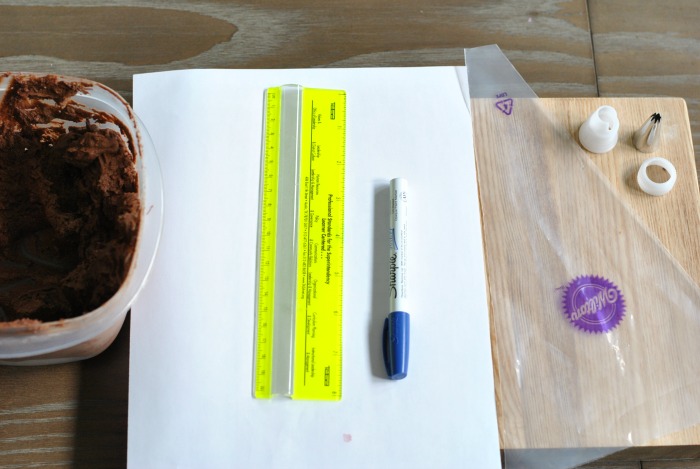
After a few minutes of practice, you are ready to move on to the cake. Here is what you will need:
- Wilton icing bag (disposable or non-disposbable)
- Wilton icing tip #21
- Tip ring and coupler
- Lots of icing (basket weave technique is an icing hog). Use thick to medium texture butter cream icing. Wilton has a nice recipe here. But don’t feel limited to chocolate. You can use any flavor, or better yet use two different colors and get crazy.
- Ruler (if you’re into measuring things)
- Paper (or go directly to a cake if you don’t want to practice)
- Marker
- side note: all of this can be purchased at a craft store like Michael’s or Hobby Lobby
-
Can you smell the chocolate from there?
Steps to get going!
- Load icing into your bag with Wilton tip #21. Use the coupler to secure the tip.
-
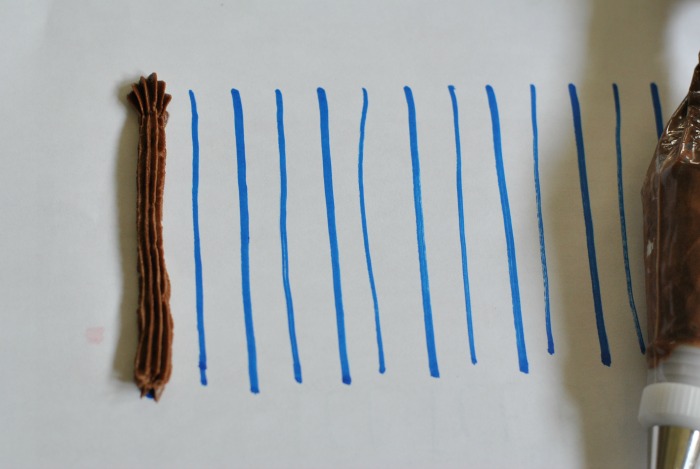
Mark your paper at ever half inch. You can use a ruler, or you can eyeball it, if you’re a rebel like me. This is pretty simple.
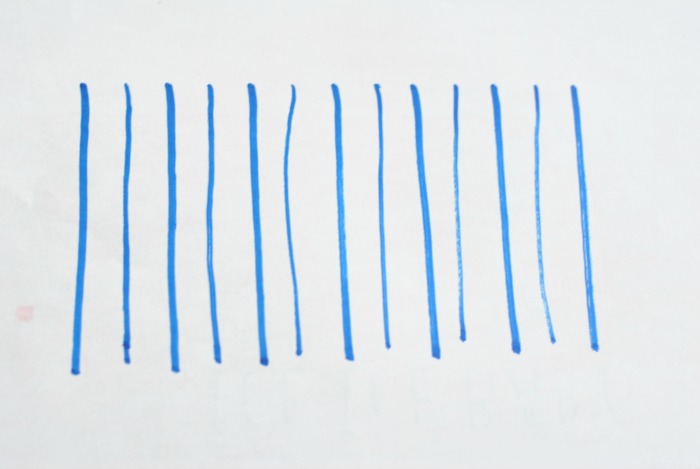
So far, so good.
- Using gentle pressure and starting from the top of the first vertical line, trace it down.
Whoo hoo. One step down.
- Now starting from the top of that line make horizontal lines to the next half inch mark on your paper. The lines should be about one half to one fourth an inch away from each other. I was able to make 5. How many lines you need to make will depend on the height of your cake.
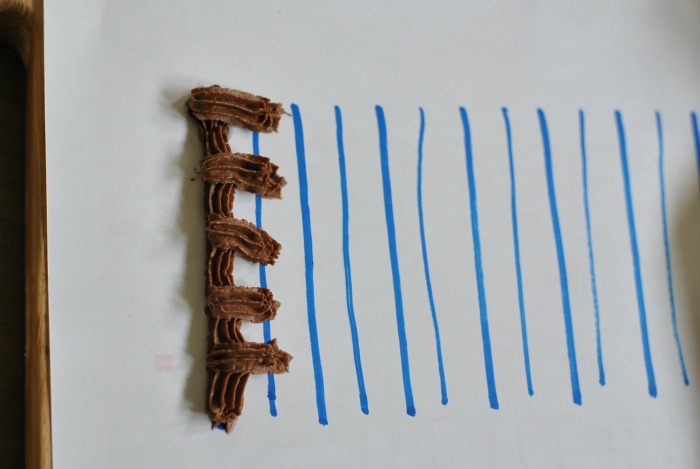 4. Now make another vertical line down, next to your horizontal lines.
 5. Do you see the little square holes we have? Those are good. Now, lets make 5 more horizontal lines STARTING INSIDE each hole.
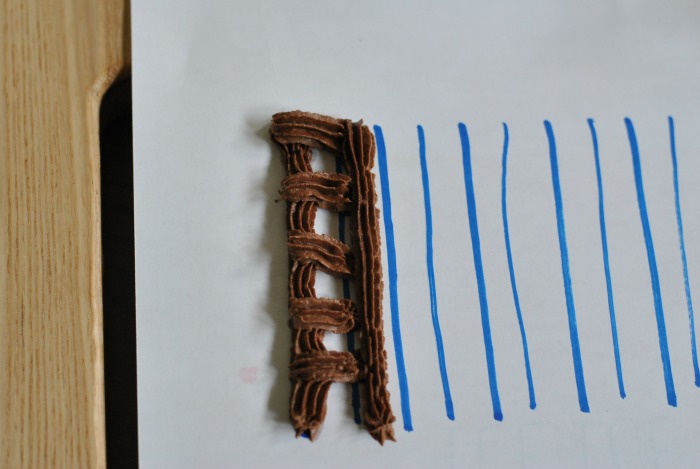
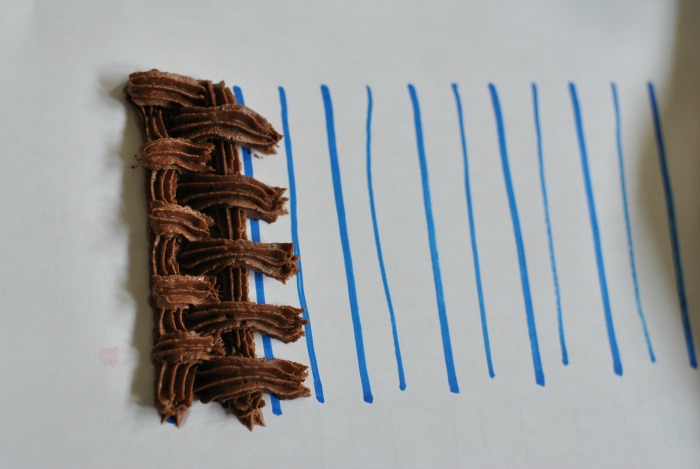 6. Now all you do is repeat steps 1-5 until you have your basket. Whoo hoo!
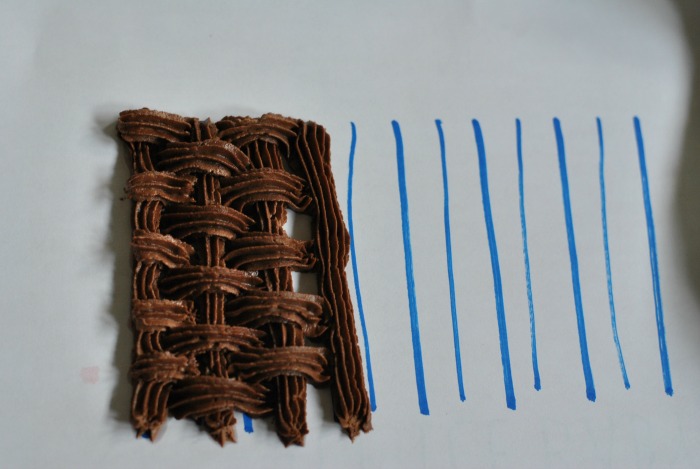 Don’t worry if you are not perfectly on your pre-drawn lines. Use them as a general guide.
 Yum. Now I can put that spoon in my mouth.
Ok you are ready to take this to the cake!
It is the same thing on the cake. You will need to have already iced the cake with a thin layer of butter cream all over BEFORE applying the weave. Make sure to mark your cake using a spatula to make small indentations in the original icing layer to mark every 1/2 inch. Wilton has a lovely marking wheel you can use to help mark a circle cake. Or be a rebel like me and eyeball it 🙂
Happy weaving!
Fancy 🙂
Looks fancier than it is, I promise!
This is so cool! I need to try this! I suck at frosting any kind of cake, but I’ll at least give it a shot 😉
Thanks Candace! The biggest key is to make a really good sturdy icing. Without a sturdy icing any decor/icing technique will flop – i would know. Wilton has a few good ones that will hold up.
So beautiful…I am really amazed at your skill with frosting. I find it very challenging!
Thanks Ameena. The wilton classes have REALLY helped, otherwise this would simply be a tasty disaster 🙂